1. background knowledge
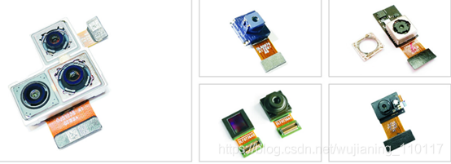
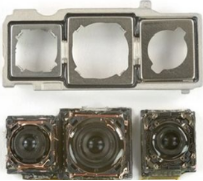
Taking pictures and video has become the basic functions of today's mobile phones, which means that almost every mobile phone now has a camera module. The latest camera module is shown in the figure below (FYI: The first two pictures below show the camera module of the Iphone12 mobile phone, and the color picture below is an example of the camera module):
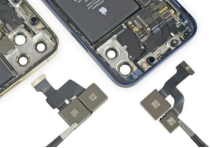
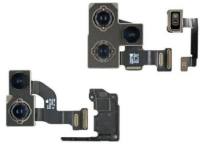
Iphone12 camera module example
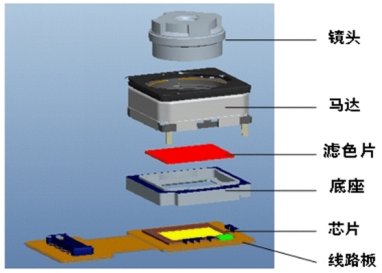
The camera module is composed as follows

The camera module is a complex system integrating light, machine, electricity, software and hardware, and the production process has high requirements for the cooperation and technical mastery of each section. A camera module involves many precision components, including circuit substrates, sensor chips, connectors, printed circuit boards, flexible circuit boards, capacitors, read-only memories, lens barrels, VCM motors, lens substrates, lenses, etc. There are also various protective films, foams, adhesives, conductive fabrics, labels, two-dimensional codes, copper foils and some special accessories for quality enhancement and product protection. The sticking production of an auxiliary material requires a lot of manpower and material resources to be accurately completed.
Therefore, the camera module inspection of the corresponding processes is also very complicated, and it is necessary to judge dozens of appearance defects such as appearance scratches, dirt, spots, dust, color difference and traces, as well as to determine the height difference of the steel sheet and the glue coating height. , module height difference, etc. for high-precision measurement. If all this is handled manually, there will be a lot of labor waste caused by manual inspection operations, as well as many risks such as secondary damage, missed inspection, and misjudgment caused by manual contact with the product, resulting in the inability to accurately control the inspection yield and unstable. The problem.
The metal protection sheet used in the camera module is generally a high-gloss surface of stainless steel, which is easy to detect light reflection, is small in size, and has a curvature or a slope.
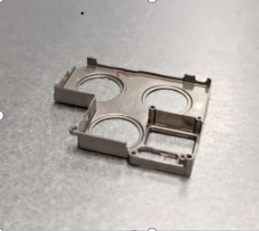
The shape of the protective sheet is shown in the figure below (respectively, "Horizontal Sanlian" and "Yuba Sanlian"):
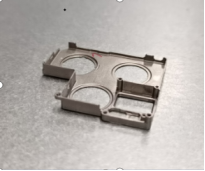
In this case, the height difference detection of the protective sheet cannot be achieved by traditional manual detection methods and 2D machine vision detection methods.
2. Steel protection sheet detection scheme
Nextvision's integrated 3D camera (LVM-2620) 3D scanning system solution cooperates with the detection system software, which can scan all the coordinate data of the camera module very quickly. Through the data processing of 3D point cloud, the height of the camera protection sheet can be calculated Difference measurement, including the height difference measurement of the current single-camera, dual-three, triple-camera, quad-camera and other brand mobile phone camera module protection sheets.

2.1 Using the camera
All-in-one 3D line laser camera LVM-2620.
The LVM-26 2 0 has 1920 actual physical contour points in the X direction, the maximum FOV field width is greater than 35 mm, and the Z direction depth of field is 25 mm. Capture speeds up to 2500 frames per second in full frame. It is suitable for high-precision and high-speed measurement of mobile phone camera module protection sheets.
|
Product number |
LVM-2620 |
|
Laser wavelength |
405nm |
|
Installation Clear Distance (CD, mm) |
34 |
|
Proximal FOV (unit: mm) |
26 |
|
Distal FOV (unit mm) |
38 |
|
Depth of Field (MR, mm) |
25 |
|
contour points |
4096 |
|
Resolution in X direction (unit um) |
14 to 20 |
|
Z direction repeatability (unit um) |
0.5 |
|
Linearity in Z direction (+/-% of MR) |
0.02 |
|
Scan speed (point cloud profile/sec) |
2500~56000 |
|
Power (DC, V) |
+24V |
|
Laser class |
2M (adjustable output, optional 3R) |
|
Operating temperature |
0~50°C |
|
Protection class |
Aluminum alloy fully enclosed design, IP67 |
|
Communication Interface |
10 Gigabit network interface (compatible with Gigabit), 1 24VTTL input, 1 output, |
|
Vibration experiment |
10 to 55 Hz, double amplitude 1.5 mm, 2 hours each in X, Y, Z directions |
|
Impact test |
Half-sine shock with a peak acceleration of 15g and a duration of 11ms |
(LVM-2630 parameters)
1. Detection method
It is beneficial to 3D point cloud data, fitting the reference plane, and measuring the height difference data (step difference) from the specified position to the reference plane .
2. Detection effect
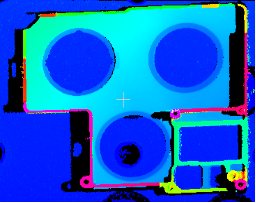
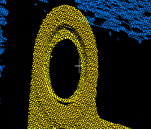
X and Y directions can reach below 20um. The accuracy requirements are high, and the repeatability of the testing equipment is within ±5μm. High-speed detection, the frame rate can reach 2500fps in full frame.
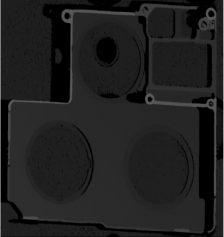
The detection and sampling effect is as follows:

 2021/09/02
